
전체 소스코드는 여기에서 확인해볼 수 있습니다.
프로젝트 생성
$ npx create-react-app redux-test --template typescript # Typescript는 옵션입니다.
Redux 설치
$ npm i redux react-redux// package.json
{
"name": "redux-test",
"version": "0.1.0",
"private": true,
"dependencies": {
"@testing-library/jest-dom": "^5.16.5",
"@testing-library/react": "^13.4.0",
"@testing-library/user-event": "^13.5.0",
"@types/jest": "^27.5.2",
"@types/node": "^16.18.14",
"@types/react": "^18.0.28",
"@types/react-dom": "^18.0.11",
"react": "^18.2.0",
"react-dom": "^18.2.0",
"react-redux": "^8.0.5",
"react-scripts": "5.0.1",
"redux": "^4.2.1",
"typescript": "^4.9.5",
"web-vitals": "^2.1.4"
},
"scripts": {
"start": "react-scripts start",
"build": "react-scripts build",
"test": "react-scripts test",
"eject": "react-scripts eject"
},
"eslintConfig": {
"extends": [
"react-app",
"react-app/jest"
]
},
"browserslist": {
"production": [
">0.2%",
"not dead",
"not op_mini all"
],
"development": [
"last 1 chrome version",
"last 1 firefox version",
"last 1 safari version"
]
}
}
Reducer 제작
src/reducers/index.tsx
// 저장된 모든 Reducer들을 한곳으로 합쳐준다.
import { combineReducers } from "redux";
import userInfo from "./user-info";

const rootReducer = combineReducers({
    userInfo
});

export default rootReducer;

export type RootState = ReturnType<typeof rootReducer>;src/reducers/user-info.tsx
// reducer 정의
export const setUserName = (userName: string) => ({
    type: "SETUSERNAME" as const,
    userName
});

// set main reducer
type UserInfo = ReturnType<typeof setUserName>

const init = {
    userName: 'Conative'
};

const userInfo = (state = init, action: UserInfo) => {
    switch (action.type) {
        case "SETUSERNAME":
            return {
                ...state,
                userName: action.userName
            };

        default:
            return state;
    }
};

export default userInfo;
Reducer 적용
src/index.tsx
import React from 'react';
import ReactDOM from 'react-dom/client';
import './index.css';
import App from './App';
import reportWebVitals from './reportWebVitals';

// 이 영역이 추가됩니다. ------
import { legacy_createStore as createStore } from "redux";
import { Provider } from "react-redux";
import rootReducer from './reducers';
const store = createStore(rootReducer);
// ----------------------------

const root = ReactDOM.createRoot(
  document.getElementById('root') as HTMLElement
);

root.render(
  <Provider store={store}>  {/* Provider로 감싸고, 만든 store을 적용 */}
    <React.StrictMode>
      <App />
    </React.StrictMode>
  </Provider>
);

reportWebVitals();이제, 테스트를 위한 Component를 제작한다.
컴포넌트 제작
src/components/Input-Name.tsx
import { ChangeEvent } from 'react';
import { useDispatch } from "react-redux";
import { setUserName } from '../reducers/user-info';

// 이름을 입력받는 컴포넌트
const InputName = () => {
    // dispatch 정의
    const dispatch = useDispatch();

    const handleInputName = (e: ChangeEvent<HTMLInputElement>) => {
        dispatch(setUserName(e.target.value));  // 적용!
    }

    return (
        <div>
            <input type="text" onChange={handleInputName} />
        </div>
    )
}

export default InputName;src/components/Get-Result.tsx
import { useSelector } from "react-redux";
import { RootState } from '../reducers';
// 결과값 보기
const GetResult = () => {
// Store에 저장된 Username 갖고오기
const { userName } = useSelector((state: RootState) => state.userInfo);
return (
<div>
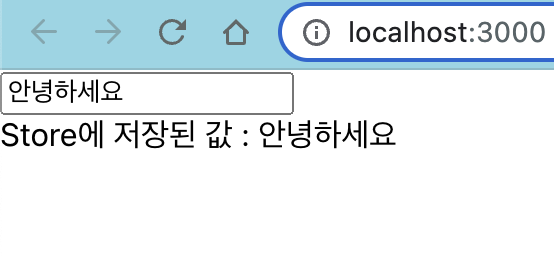
Store에 저장된 값 : {userName}
</div>
)
}
export default GetResult;src/App.tsx
import InputName from "./components/Input-Name";
import GetResult from "./components/Get-Result";

function App() {
  return (
    <div className="App">
      <InputName />
      <GetResult />
    </div>
  );
}

export default App;결과
CodeSandbox
CodeSandbox is an online editor tailored for web applications.
codesandbox.io
문제점
Redux는 무조건 동기적으로 Dispatch가 이루어지기에, 이를 여러번 할 경우 로직을 2번 써야 함과 동시에 사용자들에게 불편할 수 있다. (동기보다 비동기로 진행해야 UX가 높기 때문)
이를 해결하기 위해 나온 것이 Redux-saga로, 이는 다음 글에서 다루어 보겠다.
Redux-Saga
전체 소스코드는 여기에서 확인해볼 수 있습니다. 개요 Redux-Saga의 Github에서는 아래와 같이 설명하고 있다. Redux-Saga는, 애플리케이션 부작용(예: 데이터 가져오기와 같은 비동기 작업 및 브라우
conative.tistory.com
참고 자료
전체 소스코드는 여기에서 확인해볼 수 있습니다.
프로젝트 생성
$ npx create-react-app redux-test --template typescript # Typescript는 옵션입니다.
Redux 설치
$ npm i redux react-redux// package.json
{
"name": "redux-test",
"version": "0.1.0",
"private": true,
"dependencies": {
"@testing-library/jest-dom": "^5.16.5",
"@testing-library/react": "^13.4.0",
"@testing-library/user-event": "^13.5.0",
"@types/jest": "^27.5.2",
"@types/node": "^16.18.14",
"@types/react": "^18.0.28",
"@types/react-dom": "^18.0.11",
"react": "^18.2.0",
"react-dom": "^18.2.0",
"react-redux": "^8.0.5",
"react-scripts": "5.0.1",
"redux": "^4.2.1",
"typescript": "^4.9.5",
"web-vitals": "^2.1.4"
},
"scripts": {
"start": "react-scripts start",
"build": "react-scripts build",
"test": "react-scripts test",
"eject": "react-scripts eject"
},
"eslintConfig": {
"extends": [
"react-app",
"react-app/jest"
]
},
"browserslist": {
"production": [
">0.2%",
"not dead",
"not op_mini all"
],
"development": [
"last 1 chrome version",
"last 1 firefox version",
"last 1 safari version"
]
}
}Reducer 제작
src/reducers/index.tsx
// 저장된 모든 Reducer들을 한곳으로 합쳐준다.
import { combineReducers } from "redux";
import userInfo from "./user-info";

const rootReducer = combineReducers({
    userInfo
});

export default rootReducer;

export type RootState = ReturnType<typeof rootReducer>;
src/reducers/user-info.tsx
// reducer 정의
export const setUserName = (userName: string) => ({
    type: "SETUSERNAME" as const,
    userName
});

// set main reducer
type UserInfo = ReturnType<typeof setUserName>

const init = {
    userName: 'Conative'
};

const userInfo = (state = init, action: UserInfo) => {
    switch (action.type) {
        case "SETUSERNAME":
            return {
                ...state,
                userName: action.userName
            };

        default:
            return state;
    }
};

export default userInfo;
Reducer 적용
src/index.tsx
import React from 'react';
import ReactDOM from 'react-dom/client';
import './index.css';
import App from './App';
import reportWebVitals from './reportWebVitals';

// 이 영역이 추가됩니다. ------
import { legacy_createStore as createStore } from "redux";
import { Provider } from "react-redux";
import rootReducer from './reducers';
const store = createStore(rootReducer);
// ----------------------------

const root = ReactDOM.createRoot(
  document.getElementById('root') as HTMLElement
);

root.render(
  <Provider store={store}>  {/* Provider로 감싸고, 만든 store을 적용 */}
    <React.StrictMode>
      <App />
    </React.StrictMode>
  </Provider>
);

reportWebVitals();
이제, 테스트를 위한 Component를 제작한다.
컴포넌트 제작
src/components/Input-Name.tsx
import { ChangeEvent } from 'react';
import { useDispatch } from "react-redux";
import { setUserName } from '../reducers/user-info';

// 이름을 입력받는 컴포넌트
const InputName = () => {
    // dispatch 정의
    const dispatch = useDispatch();

    const handleInputName = (e: ChangeEvent<HTMLInputElement>) => {
        dispatch(setUserName(e.target.value));  // 적용!
    }

    return (
        <div>
            <input type="text" onChange={handleInputName} />
        </div>
    )
}

export default InputName;
src/components/Get-Result.tsx
import { useSelector } from "react-redux";
import { RootState } from '../reducers';

// 결과값 보기
const GetResult = () => {
    // Store에 저장된 Username 갖고오기
    const { userName } = useSelector((state: RootState) => state.userInfo);

    return (
        <div>
            Store에 저장된 값 : {userName}
        </div>
    )
}

export default GetResult;
src/App.tsx
import InputName from "./components/Input-Name";
import GetResult from "./components/Get-Result";

function App() {
  return (
    <div className="App">
      <InputName />
      <GetResult />
    </div>
  );
}

export default App;
결과
CodeSandbox
CodeSandbox is an online editor tailored for web applications.
codesandbox.io
문제점
Redux는 무조건 동기적으로 Dispatch가 이루어지기에, 이를 여러번 할 경우 로직을 2번 써야 함과 동시에 사용자들에게 불편할 수 있다. (동기보다 비동기로 진행해야 UX가 높기 때문)
이를 해결하기 위해 나온 것이 Redux-saga로, 이는 다음 글에서 다루어 보겠다.
Redux-Saga
전체 소스코드는 여기에서 확인해볼 수 있습니다. 개요 Redux-Saga의 Github에서는 아래와 같이 설명하고 있다. Redux-Saga는, 애플리케이션 부작용(예: 데이터 가져오기와 같은 비동기 작업 및 브라우
conative.tistory.com